Transitioning TFS into GitHub Git Repository

Here are transition steps for a solution from TFS over to GitHub using Git Extensions. We will establish a repository on GitHub and create a feature branch.

Step 1. Establish repo in Github

  • On the homepage of your GitHub account, there is a green but that says ‘New Repository’; Click it.
    • Change the Owner to Your Account
    • Enter your Repository Name.
    • Select Private/Public (Your Preference)
    • Add .gitignore for CSharp (Pick applicable language.  This keeps git from version-ing unnecessary files)

Step 2. Establish master code branch (contains current production code)

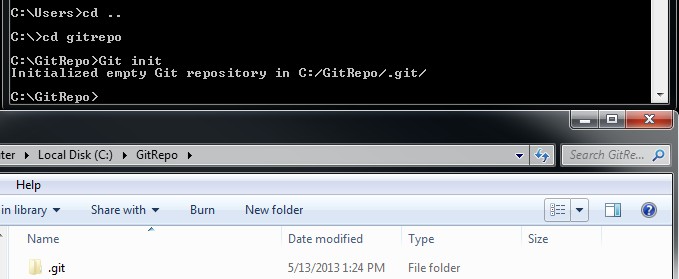
  • Create a Directory at C:\Git
  • Right-Click on C:\Git and GitEx Clone
    • Repository to Clone: https://github.com/YourAccount/RepositoryName.git  (GitHub given location)
    • Destination C:\Git
    • Everything else blank.
    • (May be prompted for credentials: These are the credentials you log in to github.com with)
  • Copy Source code from your TFS location or wherever into C:\Git
    • May take awhile depending how big code solution is
  • Right-Click on  C:\Git
    • GitEx Commit
    • Stage All (May take awhile)
    • Add a comment then ‘Commit & push’
    • Will do intial commit, (click ok) then bring up push dialog, and wait again… for a while…then Ok.

    Now you should be able to look on the GitHub site and see all the files you just pushed.

Step 3. Establish Feature Crew branches

  • Create branch locally (Don’t need to check it out)
    • Right-Click on your local Repository (ex c:\Git)
      • Git Extensions
      • Enter Branch Name (ex: FeatureCrewBranch)
      • Deselect Checkout after create
      • Create Branch
  • Push FeatureCrewBranch to remote (Branch to push FeatureCrewBranch to FeatureCrewBranch)
    • Right-Click on your local Repository (ex c:\Git)
      • Git Extensions
      • Push
      • Remote origin (Master)
      • Branch to push FeatureCrewBranch to FeatureCrewBranch
      • Add tracking reference

4. Probably will want to compress Git database

  • Right Click on your local repository (ex. C:\Git)
    • Select Git GUI
  • Select compress the db now (Popped up a window for me..will take a bit)
    • If no pop up shows
      • Click Repository in top left
      • Compress Database

It’s not the hardest process, but it is kind of confusing. Please let me know if you have any ideas or clarifications that we can make.

How to Use Git and Simple Git Commands

This is a very vast concept and way too much for one post so I will start off basic and add subsequent posts as I go deeper. The first step is to obviously install Git. At the time of writing this I am using Git 1.8.1.2. Since this lends itself to personal preference and team preference I will not cover the install.
Once you have Git installed, let’s open a command prompt. The very first command I want you to run is simply: Git. This will ensure that you installed Git and we are ready to go. You should see a screen as such below.

Simple Git Commands 1

If you see this output from your command line then you are set up and we are ready to get started. The next step we need to do is create a local folder that we will use as our Git Repository.

-Create a folder at C:\GitRepo
-Use your command line and change directories to new created directory.
-Run Git Command:  Git init
-Verify you have the results below.

Simple Git Commands 2

The top being the command prompt and the bottom showing the folder you created and now a .git file. The .git file is a Git repository and will host all the files that we add and commit to it throughout this tutorial. The next thing we need to do is set some global config settings so that we have a username and email associated with our commits.

-Run Git Command: Git config --global user.name "Adam Drummond"
-Run Git Command: Git config --global user.email "adam@adamthings.com"

Now let’s make our first commit. In the directory we created C:\GitRepo lets create a text file and add a line of content to it. We will then add this to our repository and then commit it.

-Create text file name MyFirstCommit.txt
-Add some content to text file.
-Run Git Command: Git add MyFirstCommit.txt

At this point in time, our file is in what would be considered a staging area. It’s been adding to the repository but it has not been ‘checked in’ or ‘committed’ to the repository.

-Run Git Command: Git commit --m "This is my first commit."

This should be what your current state looks like.

Simple Git Commands 3

The last piece we will cover in this blog post is seeing the history of what has happened. For this we will use the following command.

-Run Git Command: Git log --oneline --graph --decorate –all

Since we have only made one commit, our graph is only one line.

Simple Git Commands 4

This graph will continue to grow in the next blog post as we add some branching in Git. Stay Tuned.

StackOverflow Profile