How to write a simple unit test using Enzyme?

Enzyme is a popular JavaScript testing library that allows you to test the components of your React applications in a simple and intuitive way. In this tutorial, we will go over the basics of setting up an enzyme unit test for a simple React component.

Prerequisites

Before we get started, you will need to have the following tools installed on your machine:

  • Node.js and npm (or yarn)
  • A React project that you want to test
  • The enzyme library, which can be installed using the following command:
npm install --save-dev enzyme enzyme-adapter-react-16

Setting up the Test Environment

Before we can write our first enzyme test, we need to set up the test environment. This involves creating a test file and importing the necessary libraries and dependencies.

Here is an example of a test file that is set up to test a React component:

import React from 'react';
import { shallow } from 'enzyme';
import MyComponent from './MyComponent';

describe('MyComponent', () => {
  it('renders correctly', () => {
    const wrapper = shallow(<MyComponent />);
    expect(wrapper).toMatchSnapshot();
  });
});

In this example, we have imported the shallow function from enzyme, which allows us to render a shallow version of our component. We have also imported the MyComponent component that we want to test.

Inside the describe block, we have defined a test case using the it function. This test case will render a shallow version of the MyComponent component and create a snapshot of it using the toMatchSnapshot function.

Writing a Test Case

Now that we have set up the test environment, let’s write a test case for our MyComponent component.

Here is an example of a test that checks if the component renders the correct text:

it('renders the correct text', () => {
  const wrapper = shallow(<MyComponent />);
  expect(wrapper.text()).toEqual('Hello, World!');
});

In this test case, we have used the text function provided by enzyme to get the text content of the component. We have then used the toEqual function to check if the text content is equal to the expected value of “Hello, World!”.

Wrapping Up

In this tutorial, we have gone over the basics of setting up an enzyme unit test for a simple React component. We have imported the necessary libraries and dependencies and written a test case that checks if the component renders the correct text.

Enzyme provides many other functions and features that allow you to test your React components in greater depth. You can find more information on these features in the Enzyme documentation.

I hope this tutorial has been helpful in getting you started with enzyme unit testing. Happy testing!

AI writing assistants for creating blog post

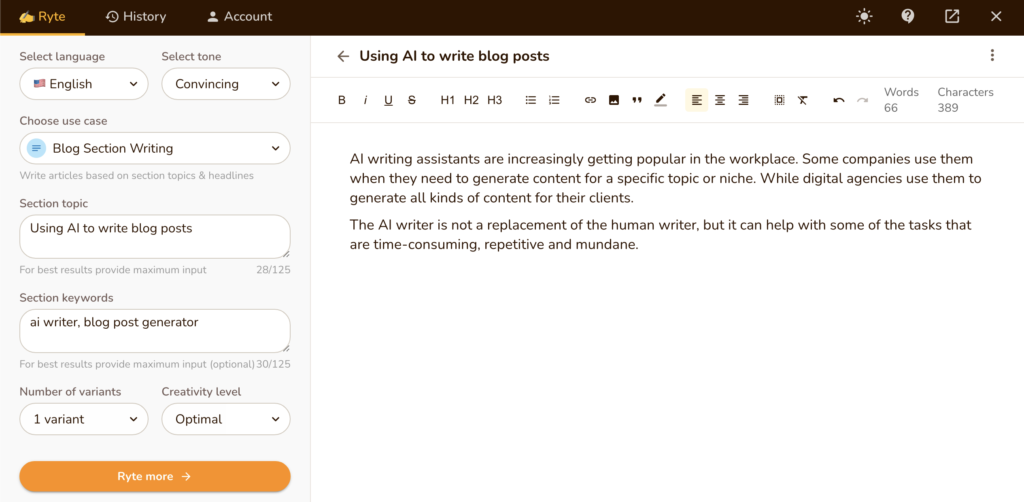
AI writing assistants are increasingly getting popular in the workplace. Some companies use them when they need to generate content for a specific topic or niche. While digital agencies use them to generate all kinds of content for their clients.

The AI writer is not a replacement of the human writer, but it can help with some of the tasks that are time-consuming, repetitive and mundane.

Would you believe that artificial intelligence wrote the first two paragraphs for me?!

Try out Rytr – Best AI Writer, Content Generator & Writing Assistant for 5,000 free characters with extremely affordable plans! Save yourself your most valuable asset… TIME.

Rytr is the best AI writer on the market today with plenty of customizable options. Having AI writing assistants can help you with Blog Section Writing, Blog Idea & Outline, Emails, and even Job Descriptions.


AI assistants are not a replacement for human writers. They are just an assistant that helps the writer with their work. They can help you generate ideas and write blog posts at scale without any downtime.

With AI assistants, you can spend more time on what matters – creativity and emotions.

Never have blog writing post mental blocks again with an unlimited AI sourced list of ideas and content to keep your website and blog fresh with new and engaging content.

Make sure to give Rytr – Best AI Writer, Content Generator & Writing Assistant for 5,000 free characters with extremely affordable monthly plans!

Implement Sentry Logging Into Node.js App

Sentry Logging For Nodejs App In Express

Sentry Logging For Nodejs App In Express

ade great use of Sentry for it’s unhandled error tracking as well as it’s capabilities for capturing custom messages. Here is a simple implementation to get Sentry up and running in a Node.js app running on Express.

const { sentry } = config;
if (sentry) {
  if (sentry.dsn) {
    // Configure Raven
    Raven.config(sentry.dsn).install();
    // The request handler must be the first middleware on the app
    app.use(Raven.requestHandler());
    // The error handler must be before any other error middleware
    app.use(Raven.errorHandler());
  }
}

We opt to store our dsn values in a config file specific to environment.

An example of a config file might look like (Values found in your Sentry Account):

module.exports = {
  env: 'dev',
  http: 8080,
  sentry: {
    clientDsn: 'https://1111111@sentry.io/22222',
    dsn: 'https://11111:2222222@sentry.io/33333333'
  }
};

This should be done as early in the process as possible, essentially as soon as you initialize

app

you should be initializing Sentry to ensure you capture exceptions at all levels.

Reference: Sentry Implementation Notes

Angular Directive Escape Key Function

Here is a quick angular directive escape key function on a div that I found somewhere (if you know the source let me know so I can give credit. It is quite a simple directive that allows you to apply it to a div or any element and assign a function for it to call.

The Directive:

app.directive('ngEsc', function () {
    return function (scope, element, attrs) {
        element.bind("keydown keypress keyup", function (event) {
            if(event.which === 27) {
                scope.$apply(function (){
                    scope.$eval(attrs.ngEsc);
                });

                event.preventDefault();
            }
        });
    };
});

Now applying the directive to an element looks like this:

//Note the tabindex="0" gives the div focus.
<div ng-esc="closeLightBoxWithEsc()" tabindex="0"></div>

Finally, the function we are calling:

$scope.closeLightBoxWithEsc = function(){
    //Anything your heart desires.
};

StackOverflow Profile